Monday, May 2, 2011

Curried Butternut Squash Soup With Coconut Milk


Last week was a bit of a whirl wind...Lots of celebrations and comings and goings and dining out.  It felt like I was hardly home, mostly because I wasn't.  The jam-packed social calendar is fun, but also exhausting!  I think I need a week to recover, and I for sure need to stay away from cake and pie and all things sweet for a bit.  At least until Mother's Day dessert...which will involve something with salted caramel...but I tease.  You'll just have to hang on for that one. 


I did find time to make a pot of soup as the weekend was winding down.  As much as I love dining out and trying new restaurants in the city, I kind of missed my own cooking.  And it's been forever since there was a pot of something delicious simmering away on the stove.  I  sort of needed to reconnect with my kitchen, if that makes any sense, and ground myself again.  Chopping and stirring always seems to do that. 


With all of the hullabaloo (isn't that the best word?) the cupboards and fridge were fairly bare...just almond milk, juice, some oranges, a jar of salsa and butter.  Always butter.  Not even an egg, do you believe it?  Imagine my surprise/joy when I found a forgotten butternut squash in the bottom of my cupboard, and a few almost withery carrots in the crisper.  Onions were there, thankfully, and my jar of curry paste was practically full.  Poking around in the freezer I found some lovely chicken stock I made from that amazing Roast Chicken Dinner a couple of weeks ago.  Further investigation revealed a can of coconut milk tucked away in the cupboard.  We all know that coconut milk is nectar of the gods.  This soup was gonna rock!


Butternut squash has the prettiest colour of all the vegetables, don't you think?  That soft orangey/peachy glow gets me every time I cut one open.  Sneaking in the carrots didn't compromise the flavour either...because sometimes carrot soup can be a little too...carroty.  Drizzling in some maple syrup and finishing the whole thing off with an infusion of lime juice really sends this soup to another level.  An immersion blender is your best friend, but if you don't have one, pureeing in a blender will work fine too...just proceed with caution...you don't want this lovely colour splattered all over your kitchen. 
I'm happy to report that the chives garnishing my soup came from one of my flowerbeds outside my back door.  Feels perfectly awesome to be picking something green again...even if it is just the humble chive!


Curried Butternut Squash Soup With Coconut Milk

1 large butternut squash, peeled and chopped
2 tbsp canola oil
1 large onion, chopped
2 cloves garlic, minced
1-2 heaping tbsp Indian curry paste, mild or hot (I like Patak's best)
1 L chicken stock (or veggie stock)
1 398 ml can coconut milk
2 tbsp maple syrup
2 tbsp fresh lime juice
salt, pepper

In a large soup pot, heat the oil.  Add the onion and saute a few minutes.  Add the squash, and garlic (and a few carrots, chopped, if you like).  Cook a couple more minutes.  Add the curry paste and stir for about 2 more minutes.  Add the stock, just to cover the veg.  Cover and bring to a boil.  Reduce heat and simmer until squash tender.  Remove from heat and using an immersion blender, puree soup until smooth.  Put  back on heat and add the coconut milk, maple syrup and lime juice.  Add salt and pepper and adjust seasonings.  If too thick, add more stock.  Soup freezes very well, and is even better the next day. 


Thursday, April 28, 2011

Chocolate Peanut Butter Pie! Oh My!


Seeing as this is the eve of the Royal Wedding, I suppose my post should be about that.  But it's not.  However, I will be among the millions waking before the crack of dawn to watch Will and Kate tie the knot, and more importantly all of my questions about "the dress"  will be answered.  I'm a sucker for weddings, and seeing as I'm sacrificing a few hours of sleep to watch this spectacle, it better be amazing! 


The "wedding" isn't the only big event this week.  It was also my birthday.  You may recall how my mom made me the most amazing Orange Chiffon Cake on Sunday for the family celebration.  THAT was a cake.  For festivities on my actual birthday, I decided to make a chocolate peanut butter pie.  You know the rule right?  That all calories count for nothing on your birthday, so go ahead and dig into whatever catches your fancy.  That's my rule, anyway.  And I like it!


A few friends gathered, and we went out for some Korean food.  (A review will follow in a week or so.) With our belly's full of bulgogi and bibambab we retired back to my house for another bottle of wine, and this amazing chocolate peanut butter pie.  My sister was in town visiting, and she managed a short escape from her wee ones, just in time for wine and pie!  We talked about mothers, and crying at concerts, and whether I should I go to my 20th High School Reunion.  Good times.  Last night was one of those nights you want to savour every second of.  It was a really really good birthday. 


Now about the pie.  I used to make CPBP lots when I worked in Edmonton, but do you think I could find the recipe in the vortex of my recipe cupboard?  Hells no.  Some online investigating turned up a quite similar recipe from Martha Stewart.  And it's really good....but I would change a few things (I know, I just called Martha out on a recipe!  How dare I?)  I would add more peanut butter.  We agreed that it needed more peanut butter punch.  And I would have a ganache topping instead of a chocolate and peanut butter drizzle like she calls for.  Why drizzle when you can ganache?  The method is incredibly simple, and I love how you can make it ahead and keep in the freezer.  Just be sure to allow time for it to thaw so you can cut it.  Yes, my birthday pie rocked.  So good I'd even offer a slice to William and Kate if they ever wanted to visit. 


Chocolate Peanut Butter Pie

Crust:
1 3/4 cup chocolate cookie crumbs (Oreo)
6 Tbsp butter, melted
3 Tbsp brown sugar
dash of salt

Filling:
6 oz. cream cheese
3/4 cup icing sugar
1 tsp salt
1 1/4 cup smooth peanut butter (not the natural or crunchy king).  I would increase this by 1/2 cup if I were to make it again. 
1 tsp vanilla
2 cups heavy cream
1/2 cup heavy cream
3 ounces semi sweet or dark chocolate chopped


To make the crust:  Preheat oven to 350*F.  Combine crust ingredients in a bowl, and press into a 9 inch glass pie plate.  Bake for 9 minutes.  Remove and cool completely. 

Filling: In a mixer, beat 2 cups of the heavy cream until thick.  Remove to a bowl and set aside. Using a mixer, cream the cream cheese and icing sugar.  Add the salt and peanut butter and vanilla. Mix well.
Gently fold in one third of the whipped cream.  Fold in the remaining two thirds, very gently until no white streaks remain. Smooth into the cool pie shell.  Freeze for one hour.   

Ganache:  Heat 1/2 cup of heavy cream until boiling.  Pour over the chopped chocolate.  Stir well until completely smooth.  Spread onto the pie.  Freeze again, for at least 3 hours, or overnight.  If leaving overnight, thaw a few hours before cutting.  This is rich stuff and a little goes a long way.  Serve 10-12.  Adapted from Martha Stewart Living.


Tuesday, April 26, 2011

Another Slice of Orange Chiffon Cake, Please!


Tomorrow is my birthday, and while I'm not super excited to be inching ever-so-close to an age which shall be unnamed, I have to say I'm really happy the way my little life has unfolded so far.  Birthdays are when I sort of take stock of all the big things, like health and hair (awesome), finances (good, but working on it), goals (France before Forty!), and love life (laughable, but not without hope).  I've been schmaltzy about gratitude before, and I feel it even more so around this time of year.  I really would have nothing without the love of my close-knit family and friends ~ they are my biggest cheerleaders and supporters of all things culinary and beyond.


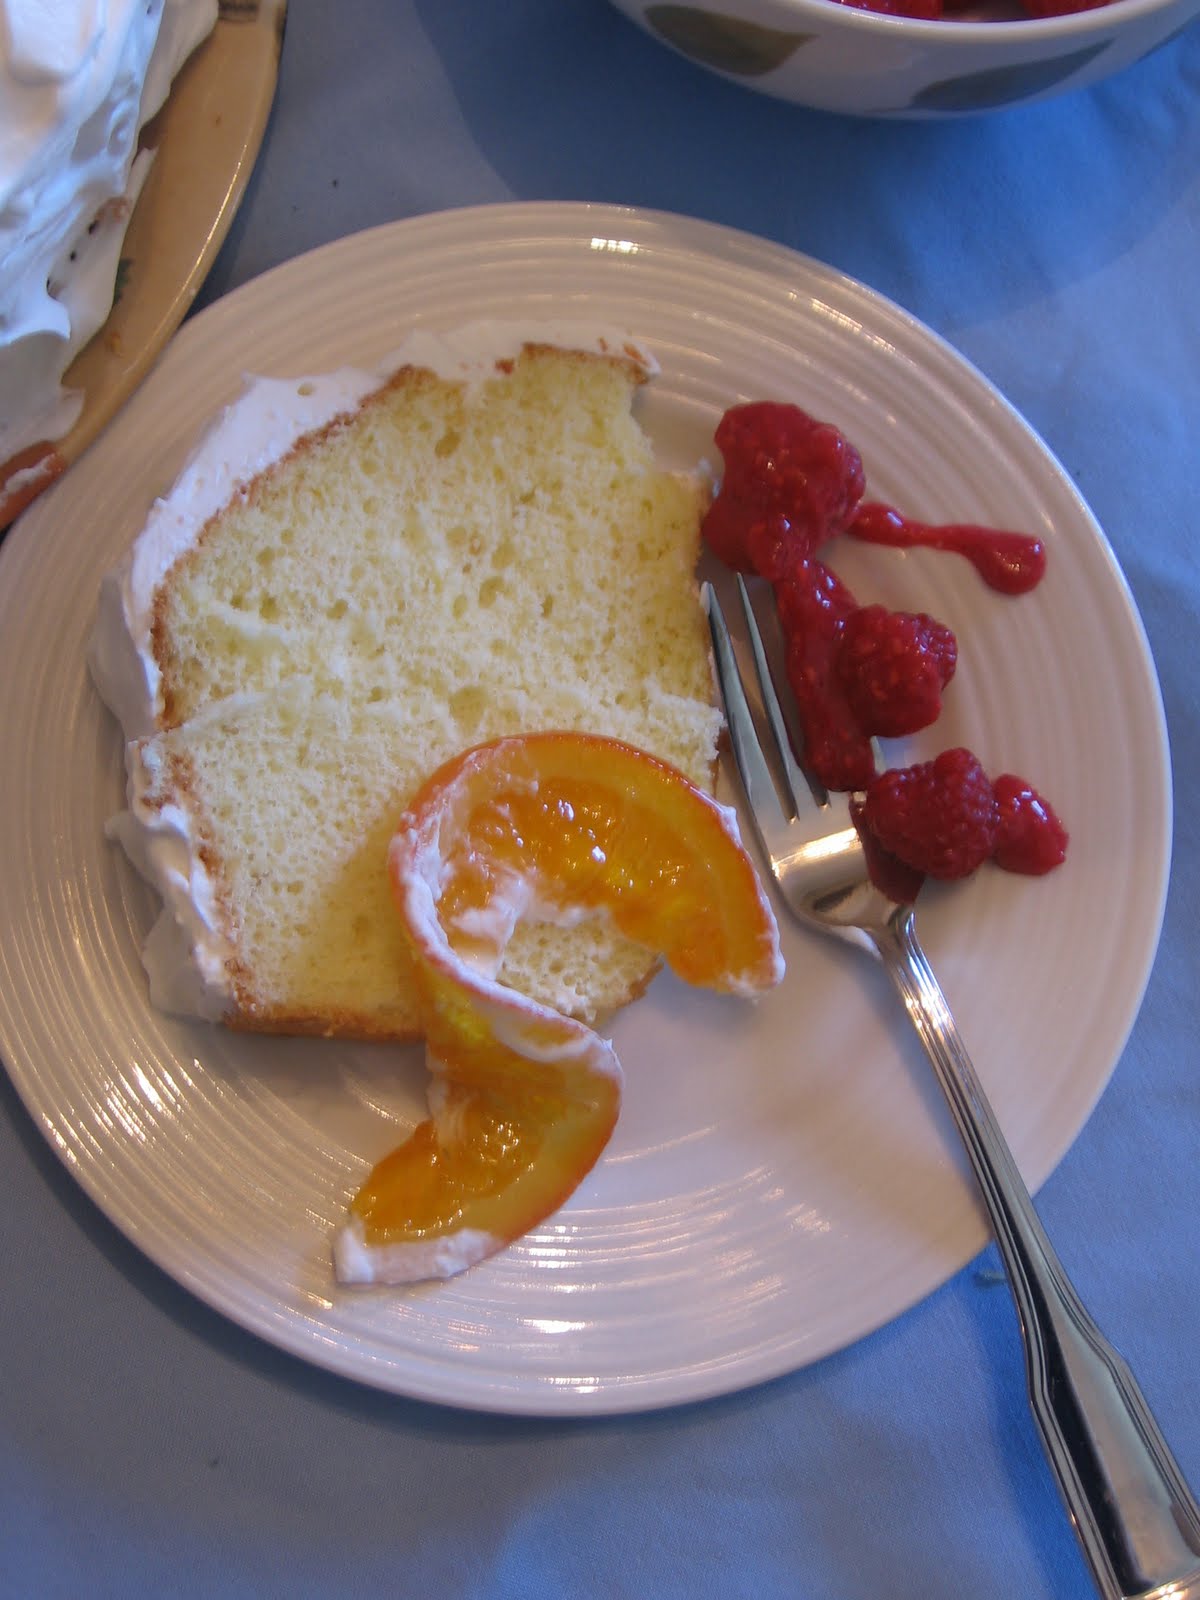
This past weekend was a whirlwind of activity, with big family dinners and lots of playing outside in the sunshine.  Mom had an Easter Sunday feast which again blew us away, with her turkey and famous stuffing, gloriously fluffy potatoes, and gravy.  Oh the gravy.  For dessert she made an early birthday cake for me.  When she asked for input I told her I wanted a tall cake, something glamorous, how about chiffon?  She had oranges to use up, so orange chiffon it was.  Iced with whipped cream and garnished with fresh raspberries and candied orange slices, it was a tremendous cake.  Little pokey fingers were in the cake while "happy birthday" was being sung, and the mouth that belonged to the fingers helped blow out the candles too.  Looking around at my beautiful mom, my brother and sisters,  the big kids and the little humans with chubby cheeks and toothy grins, I felt like the luckiest girl alive.


Chiffon cake is what angel food cake would like to be when it grows up.  Getting its height from whipped egg whites, and richness from egg yolks and vegetable oil, it boasts a richness and unbelievable tenderness.  Not too sweet, and adaptable to many flavours (hello, chocolate!), it's one of my favourite cakes.  The classic orange chiffon made its debut at the  Hollywood parties of the 1940s, and this cake is all kinds of glamour, baking up tall and light and oh so pretty.  A perfect birthday cake if there ever was one.

Orange Chiffon Cake

2 1/4 cups cake flour
1 1/2 cups sugar
1 1/2 tsp baking powder
1/2 tsp salt
1/2 cup canola oil
9 large eggs, separated
1/2 cup plus 1/3 cup orange juice
2 tsp grated orange zest
1 tsp pure vanilla extract
pinch cream of tartar
whipping cream

To prepare the cake:
Preheat oven to 350*F.  Have ready a greased 9 1/2 inch or 10 inch tube pan with sides at least 3 3/4 inches high, dusted with flour.  
In a large bowl, sift together the flour, 1 cup of sugar, baking powder and salt.  Make a well in the centre and add the oil, egg yolks, juice, zest and vanilla.  Beat on medium speed until smooth and thick, at least 3 minutes.  Set aside.
In a large clean bowl, with clean beaters or whisk attachment, whisk the whites and cream of tartar until the cream of tartar is dissolved and whites are foamy.  Increase the speed to high and beat whites until movement of the beaters forms lines in the mixture.  Slowly pour in the remaining 1/2 cup of sugar, about 2 tbsp at a time, and beat the mixture until soft peaks form. 
With a large rubber spatula, stir one third of the whites into the yolk mixture.  Gently fold in the remaining whites until no white streaks remain.  Pour the batter into the tube pan, spreading the batter evenly.  Bake until you can gently press your fingers on top of the cake and it feels firm, about 1 hour and 10 min.  Any cracks that form on top should look dry.  Invert the pan onto a bottle with a narrow neck and cool thoroughly, about one hour and a half.  Use a small sharp knife to loosen the cake from the sides of the pan and the centre of the tube.  Remove cake from pan and slide onto serving plate.  Spread with sweetened whipped cream, and garnish with fresh berries and candied orange slices.  Serves 12. 

To make the candied orange slices:  Thinly slice one orange.  In a large frying pan, bring to a boil 1 cup of water and 1 cup of sugar.  Reduce heat to medium, add the slices in a single layer, and simmer, turning occasionally, for about 50 minutes.  Let cool in syrup.  Let dry on parchment.


Saturday, April 23, 2011

Easter Bread with Candied Ginger and Dried Sour Cherries


For the past few years now I've been baking Easter bread on Good Friday.  I'm not a huge baker of bread ~ my excuse is mostly the time thing.  But I clear my calendar and set aside a few hours on this day to knead and roll and wait and punch down and wait and bake.  It's a bit of a process, but the smell in my house is worth it, as is the nice little loaf of bread in the end.  Making this bread is a welcome ritual, and I like how you really have to be physical with the dough.  If I had any frustrations, they were sure to be gone by the end of the day!


I wasn't crazy about last year's bread - it was ok, just nothing special.  For this year's Easter bread I wanted to use up some candied ginger and sour cherries I had lurking in my pantry, and I wanted a bit of a sweet dough.  The recipe I found was in this old school baking book I bough at a second hand store for a dollar.  Sweet deal!  There's a European twist to the recipes and they all have photos circa 1980.  It's good stuff, if you are a retro nerd like me.


The original recipe called for candied lemon peel and raisins.  You know by now I have a strong aversion to raisins, and the lemon peel would probably be good, but I wanted to use my ginger.  Substituting the raisins with dried cherries and a little bit of dried mango, I thought the flavours would go well with the toasted chopped nuts, and a hint of orange rind.  Once the bread comes out of the oven it was to be brushed with melted butter and sprinkled with sugar.  My kind of bread!  


To be honest, this bread was a bit of battle right off the start.  I thought I was following the instructions correctly, but it seemed terribly terribly dry, so in a mild panic I dumped a bit more milk and a couple more eggs into the KitchenAid, and let the machine work like mad to try and knead the dough into submission.  When it had come into a decent ball, I kneaded it like hell too, because I like the rhythm of kneading dough ~ it reminds me of the ceramics classes I used to take.  It was only after I had put the dough in my pretty blue bowl and was waiting for it to rise when I realized I had added my ginger too early into the process, and that may have explained why the dough hadn't come together easy.  So for a little while I thought maybe there would be no bread this year, that all of my kneading was for nought!  Not having lots of bread baking experience I wasn't sure how this goof up would affect the way it would rise in the first stage.  But soon I saw a growing bump under the tea towel.  It was rising as planned!  I poured myself a cup of tea and sat outside in the sun for a bit, awaiting the second stage.  It was smooth sailing after this...cutting the dough in half, kneading in more fruit and nuts, letting it rise again, and then finally baking it. 


I'm always a little impressed with myself when I bake bread, and it turns out half decent.  Not sure what these two golden orbs were going to taste like given the mishmash of stuff I threw in, but I was pretty pleased with the result. The bread has a wonderful light texture, the candied ginger pairs well with the cherries and sweetness of mango, and I love the toasted almonds inside.  I maybe would have added more citrus zest to perk things up,  and a tad more sugar, but overall the battle was worth it.  Spreading butter on a slice of bread so warm it melts on contact is one of life's best indulgences.  It was a good Friday indeed. 


I made all of the changes to the recipe, so next year I know exactly what I'm doing!

Easter Bread with Candied Ginger and Dried Sour Cherries

Yeast dough:
1/4 cup plus 4 tbsp sugar
2-3/4 cup warm milk
4 pkgs. active dry yeast
9 cups all purpose flour
1 tsp salt
3/4 cup plus 3 tbsp melted butter (if using unsalted butter, increase the above amount to 2 tsp salt)
4 eggs
grated zest of 2 lemons (or oranges)

Fruit loaf:
1 cup chopped toasted almonds
1 cup chopped candied ginger (or candied lemon peel), chopped
1 1/2 cups dried sour cherries (or raisins), chopped
1/2 cup dried mango, chopped
3 tbsp rum
4 tbsp melted butter
2 tbsp sugar

To make the yeast dough:
Stir 2 tsp sugar into the warm milk and sprinkle the yeast.  Let stand 5 minutes until frothy.  Stir gently to moisten any dry particles on top.  Sift flour, sugar and salt into a large bowl.  Melt butter and cool slightly. Lightly beat the butter, eggs and lemon zest into the yeast mixture.  Pour this into the flour mixture, combining to make a dough.  Knead by machine or by hand for 5 - 10 minutes until smooth and elastic.  Put into a lightly greased bowl, cover and let rise for one hour in a warm place.  
To Make the fruit loaf:
Preheat oven to 375*F
Combine the nuts and fruit/ginger in a bowl.  Sprinkle with rum and stir well.  Let stand for 35 minutes. 
Divide the dough in  half, kneading each half  a little.  Knead half of the fruit mixture into each half (I let the Kitchenaid do this bit!)  shape into a ball, let rest another 45 minutes in a warm place.  Cut a cross into the top, brush with egg yolk and bake for about one hour.  I turned the oven down to 350*F after about 40 minutes because I saw the bread getting a little too brown.  When the loaves come out, brush with melted butter and sprinkle with sugar.  Makes 2 glorious loaves (I gave one to my mom!)  Delicious fresh, and delicious toasted, with lots of butter.  Recipe adapted from "Best of Baking" by Annette Wolter and Christian Teubner.


Wednesday, April 20, 2011

Eating Cookie Dough: Double Chocolate Pecan Cookies


If you've read the "About" page at the top of my blog, you know that I've been making cookies since I was a kid, and yes, I have eaten my fair share of cookie dough.  Not too much has changed, really.  I have my favourite "stages" of cookie dough eating.  First, is the best.  The creaming of the butter and sugar together.  If left unattended, or without willpower, I could eat this forever.  With the addition of the egg, I just sneak a taste, seeing as it is a bit gross, knowing that there is raw egg mixed in with the beloved butter and sugar.  (My mom used to tell us that we would get worms if we ate too much cookie dough...or anything else that she didn't want us to eat, like raw potatoes and bread dough.  Not sure why on Earth as kids we'd want to gnaw on raw potato, but it didn't last long when she warned of the worms.  This warning was also used on fingernail biting, and eating anything that fell on the ground.  I can still hear Lorna yelling "Don't eat that!  You are going to get worms!" Oh, Mom.)  Lastly, is the stage when the dough is complete, after the addition of flour, chocolate, nuts, etc.  Magically, the egg is forgotten about, and dough is consumed at a furious pace.


Sugar cravings were at a peak this past weekend, and I wanted a double chocolate cookie.  Something with a chewy, fudgy middle, crisp outside, and with nuts.  The recipe I found on Epicurious also called for dried cherries, and while that would be pretty good, my cherries seemed a little too dry, and I think I'll save them for my Easter bread.  I made the cookie dough, enjoying all of the tasting stages, and must say I was blown away by the final tasting.  Had to consciously put the spoon down, and step away from the bowl, give myself a few minutes to regroup, and then scoop out the cookies onto the bake sheets.  Yes, it was that good.  The end product was right up there in the land of cookie perfection.  Definitely chewy inside, and when the bite contains a piece of melted chocolate and pecan and a smidge of the coarse salt, I'm glad in the end I didn't eat all of the dough.   


Double Chocolate Pecan Cookies

1 1/4 cup all purpose flour
3/4 cup cocoa
3/4 tsp baking soda
1/2 tsp coarse salt
3/4 cup unsalted butter (if using salted, omit salt above)
1 1/2 cups brown sugar
2 eggs
1 1/4 cup milk chocolate pieces
1 cup toasted pecan pieces

Combine the dry ingredients in a bowl.  In the bowl of a mixer, beat the butter and sugar until creamy and light, about 3 minutes. Add one egg at a time, scraping down the bowl between additions.  Beat two minutes more. On low speed, add the flour mixture beating just until combined.  Add  the chocolate and nuts.  Drop by two teaspoons, about 2 inches apart.  Flatten slightly with  damp fingertips.  Bake at 350 *F for 10 minutes.  Made almost 3 dozen (if I wouldn't have eaten so much dough, it probably would have been 3 dozen exactly!)  Recipe adapted from Bon Appetit. 


Sunday, April 17, 2011

Roast Chicken for the Perfect Sunday Dinner


I LOVE roast chicken.  It's in my top five favourite all time feasts.  The smell alone sends my taste buds in a whirl, and tonight I added lots of lemon and herbs so the house was especially fragrant.  Even my two cats were freaking out, hoping for some scraps to fall into their tiny jaws. But being on a diet, they were denied, and not amused. 


For me, the smell of chicken roasting stems back to my childhood.  Not sure if Mom cooked lots of chicken, or if I just loved it so much, but whenever I smell chicken I think of my Mom.  When I lived far from home and was feeling homesick, I'd open a jar of poultry seasoning and be transported over time zones and provinces, and back into my Mom's arms.  That probably sounds silly, but at the time the smell was a comfort, and I needed all of the comfort I could get, seeing as I'm a total Mamma's girl.


Seemed fitting that on this particular night, my Mom was coming for dinner.  Now that we live just a few blocks away from each other, I don't have to smell the poultry seasoning to have her close....she really IS that close.  Sometimes I have to pinch myself of the fact.  We're lucky to have each other and I never take our relationship for granted, for I know that back when I was homesick for her, she must have been missing her little girl too.


Roasting chicken is really super easy.  The better quality chicken you have, the better it's going to taste.  I got my little bird from Pine View Farms, just outside Saskatoon.  Local is better, no?  I chopped lemon and onion and garlic and put it inside the cavity.  In a small bowl I combined coarse salt and pepper, some dried thyme and rosemary, and even some dried lavender from my garden.  And sage, must have a little sage.  There is a little pocket under the chicken breast skin, so I stuffed the herb mixture there.  Sprinkled some on top too.  I let it roast for an hour at 350*F, then I took it out and nestled some baby potatoes, chopped carrots and red onion around the chicken.  I put some chicken stock in to keep things moist. Covered it up, roasting for another hour, stirring the vegetables around every now and then.  The last ten minutes I took the cover off so the skin can get crispy (chicken skin is the best!).  Let it rest for 10 minutes before slicing it up.  The pan juices make the vegetables so full of flavour and the the meat nice and tender because of the liquid in the roaster.  Heaven on a plate.  And my mom beside me too.  Best Sunday dinner.


Thursday, April 14, 2011

Kiwi And Lime Sour Cream Shortbread Tarts


Some of the best things are the simplest, right?  These little gems easily fall into that category.  I was having a little midweek gathering at my house, and wanted to serve something light and pretty, because it's SPRING! 


I also thought these would be perfect for Easter dinner dessert, because after eating a tonne of ham (or maybe that's just me?) a light, fruity dessert is the way to go.  (As a side note, can I just say one of my favourite dinners is ham and scalloped potatoes....My mom promised that's what we are eating when the family all descends on her house next weekend.  She makes this amazing honey/mustard glaze for the ham, and me and my brother always fight over the end pieces.  Can't wait!)


 The shortbread cookie base for the tarts is a cinch to make, and while I found it a bit too crispy/crumbly I also eyeballed the butter amount and may have added too much, hence the crumbly part.  I know, I know, I should have measured exactly, but sometimes I'm lazy.  So don't be lazy and follow the exact amounts!!!  The sour cream lime filling may sound weird, but it's really quite lovely...adding a sweet tang which goes so well with the buttery base and the fruit. Of course you don't have to use kiwi.  Anything in season would be fine...I think fresh raspberries from my raspberry patch would be insanely good, but I have to wait a few months yet.  Peaches, again, would be insanely good.  So go crazy and use your favourite fruit!


Kiwi and Lime Sour Cream Shortbread Tarts

2 tbsp sugar
1/2 cup flour
1/4 cup cold unsalted butter
1/2 cup sour cream (14% fat)
2 tbsp sugar
1 tsp fresh lime juice
2 firm, ripe kiwi (or your favourite fruit) peeled, cut crosswise. 

Preheat oven to 350*F.
In a food processor, combine the first 3 ingredients.  Pulse until crumbly.  Gather into a ball, and divide in half.  On a lightly floured surface, roll each half into a 5 1/2 inch circle, about 1/4 inch thick. I wanted pretty exact circles, so I used my favourite mug as a guideline.  You can leave all rustic too, if you like. 
Place circles on parchment lined bake sheet.  Bake about 10 minutes until golden around edges.  Let rest on sheet for 5 minutes.  Remove and cool.
For the sour cream filling, combine the sugar, lime juice and sour cream.  Spread on top of shortbread base, top with sliced kiwi.  Serves 2 whole, 4 if cut in half.   Recipe adapted from Bon Appetit.